Mummy Brownies
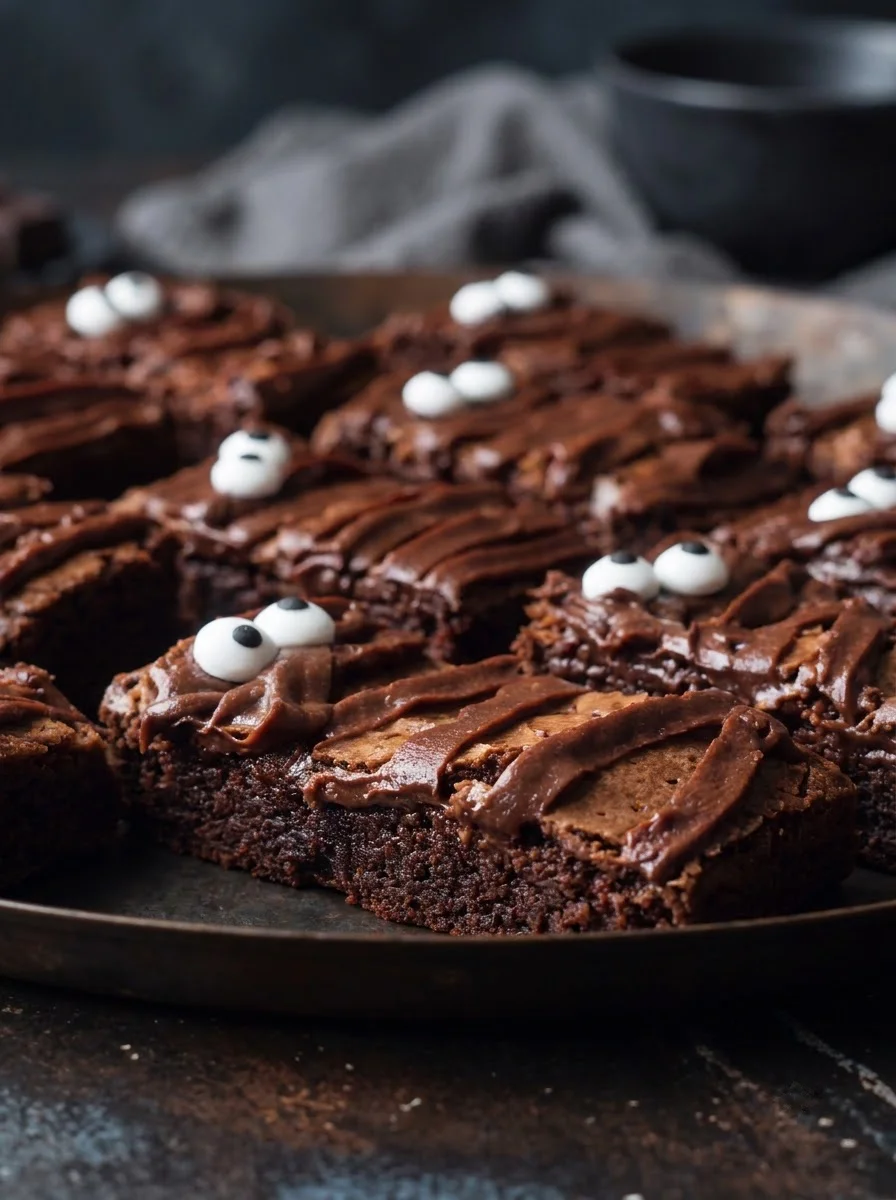
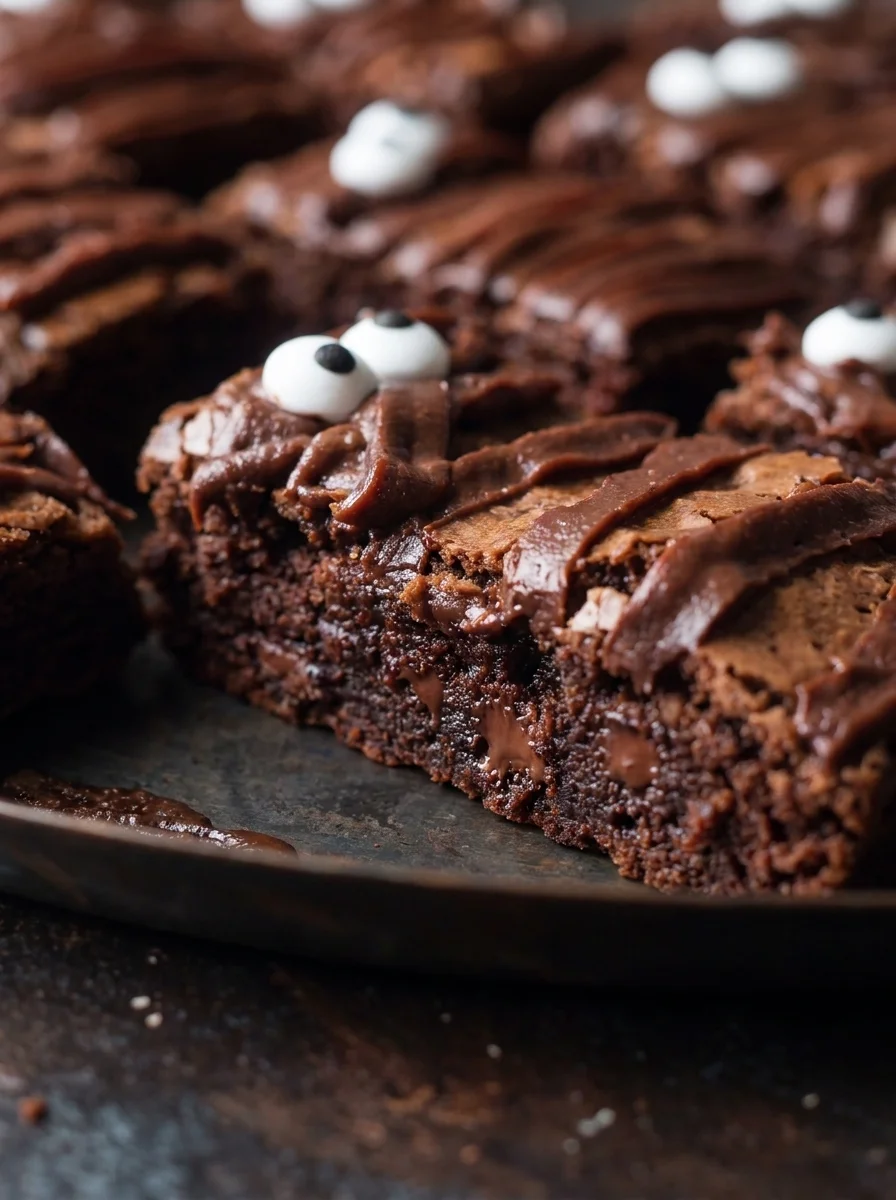
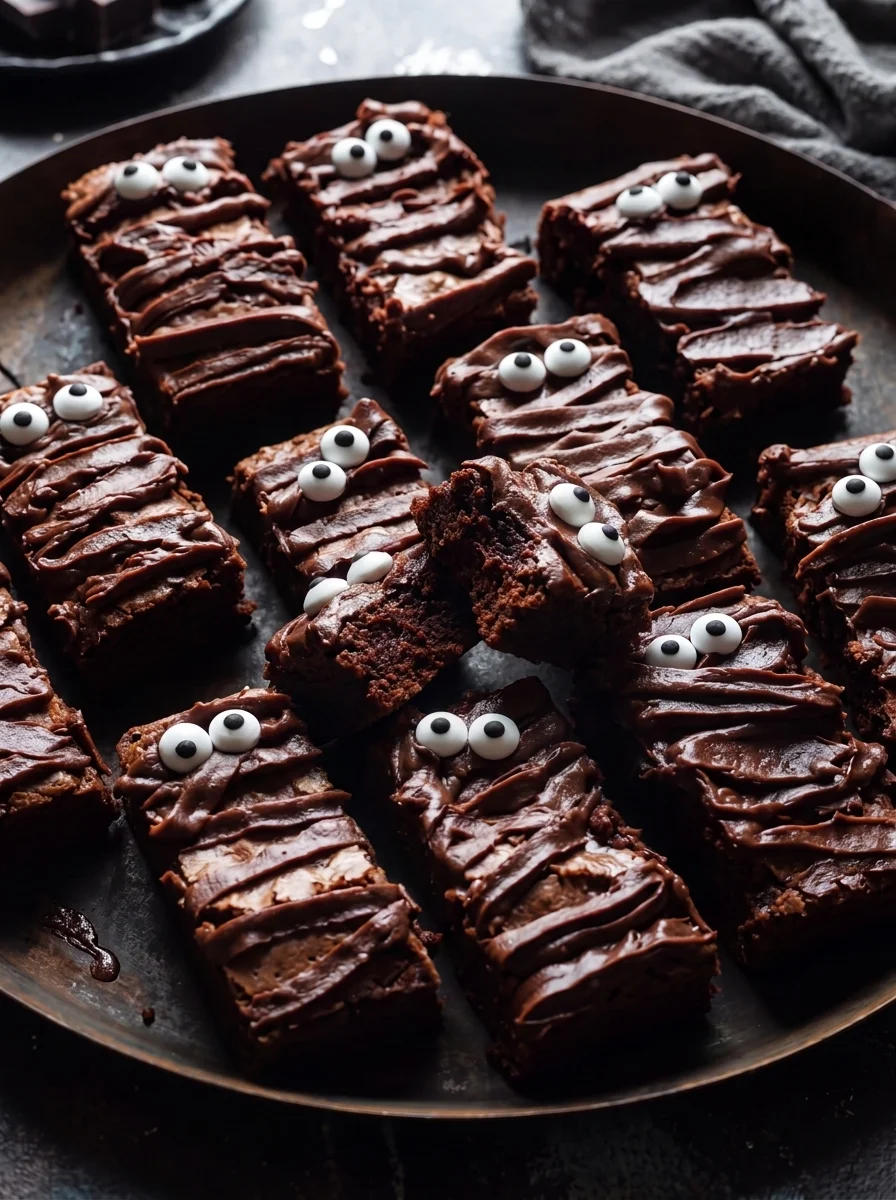
These delightful Mummy Brownies are a must-try for any Halloween celebration. Combining rich, fudgy brownies with whimsical frosting and candy eyes, they make for a fun and delicious dessert that kids and adults alike will adore. Perfect for parties or as a festive treat at home, these brownies are not only easy to make but also a visually striking addition to your holiday spread.
Why You’ll Love This Recipe
- Easy to Make: This recipe offers simple steps that anyone can follow, making it perfect for bakers of all skill levels.
- Decadent Flavor: The combination of chocolate brownies and creamy chocolate frosting ensures a rich and satisfying taste.
- Festive Presentation: With their spooky candy eyes and mummy-like appearance, these brownies are sure to impress your guests.
- Kid-Friendly Fun: Kids will love decorating the Mummy Brownies, making it an enjoyable activity for the whole family.
- Versatile Treat: These brownies can be served at Halloween parties, school events, or as a special dessert at home.
Tools and Preparation
Before diving into this delicious recipe, gather your essential tools. Having the right equipment will streamline your baking process and help you achieve perfect Mummy Brownies every time.
Essential Tools and Equipment
- 9×13 inch baking pan
- Parchment paper
- Mixing bowls
- Electric mixer
- Measuring cups and spoons
- Whisk
- Piping bag or zip-top bag
Importance of Each Tool
- Baking Pan: A 9×13 inch pan is ideal for even baking of the brownies, ensuring they come out perfectly fudgy.
- Electric Mixer: Using an electric mixer helps achieve a smooth frosting consistency quickly, saving time and effort.
- Piping Bag: A piping bag allows for precise application of frosting, creating that fun mummy bandage look.
Ingredients
These festive Mummy Brownies are a delicious and fun treat, perfect for any Halloween gathering. Fudgy chocolate brownies are topped with chocolate buttercream piped to resemble mummy bandages and finished with spooky candy eyes.
For the Brownies:
- 1 cup unsalted butter, melted
- 2 cups granulated sugar
- 4 large eggs
- 2 teaspoons vanilla extract
- 1 1/2 cups all-purpose flour
- 1 cup unsweetened cocoa powder
- 1/2 teaspoon baking powder
- 1/2 teaspoon salt
- 1 cup semi-sweet chocolate chips
For the Chocolate Frosting:
- 1/2 cup unsalted butter, softened
- 2 cups powdered sugar
- 1/2 cup unsweetened cocoa powder
- 3 tablespoons milk
- 1 teaspoon vanilla extract
For Decoration:
- 24 candy eyes (2 per brownie)
How to Make Mummy Brownies
Step 1: Preheat the Oven
Preheat your oven to 350°F. Line a 9×13 inch baking pan with parchment paper, leaving an overhang on the sides for easy removal. Spray lightly with cooking spray.
Step 2: Mix Wet Ingredients
In a large mixing bowl, combine the melted butter and granulated sugar. Mix until smooth. Beat in the eggs one at a time, then stir in the vanilla extract.
Step 3: Combine Dry Ingredients
In a separate medium bowl, whisk together the all-purpose flour, unsweetened cocoa powder, baking powder, and salt.
Step 4: Combine Wet and Dry Mixtures
Gradually add the dry ingredients to the wet mixture. Stir until just combined—do not overmix. Fold in the semi-sweet chocolate chips gently.
Step 5: Bake the Brownies
Pour the brownie batter into your prepared pan. Spread evenly. Bake for 25-30 minutes or until a toothpick inserted in the center comes out with moist crumbs attached. Avoid overbaking! Let cool completely on a wire rack.
Step 6: Cut the Brownies
Once cooled, lift the brownies out using the parchment paper overhang. Transfer to a cutting board and cut into 12 rectangular bars.
Step 7: Make Chocolate Frosting
In a medium mixing bowl, beat softened butter until creamy using an electric mixer. Gradually add powdered sugar and cocoa powder until combined.
Step 8: Add Milk and Vanilla
Add milk and vanilla extract. Beat on medium speed until light and fluffy. Adjust consistency by adding more milk or powdered sugar as needed.
Step 9: Pipe Frosting onto Brownies
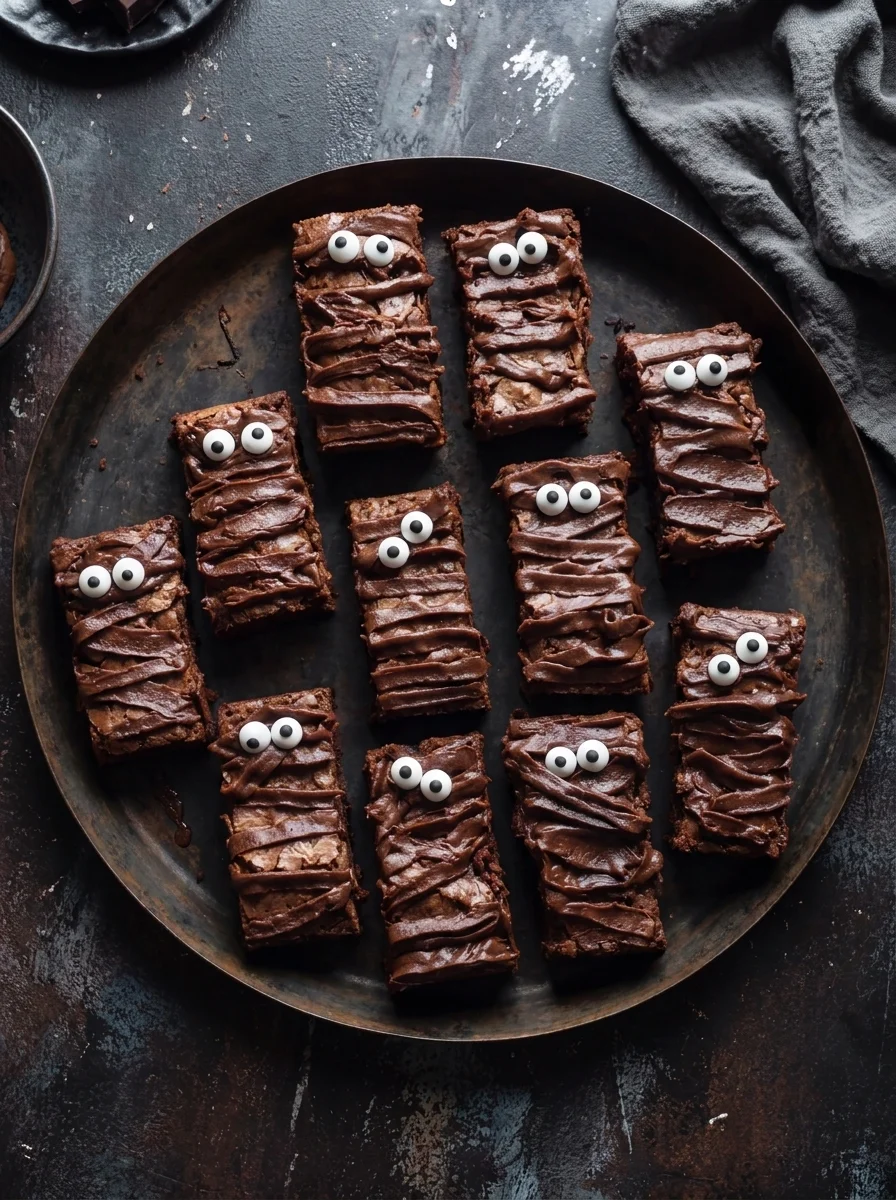
Transfer frosting to a piping bag fitted with a small round tip or use a zip-top bag with one corner snipped off. Pipe horizontal stripes of frosting across each brownie bar while leaving space at the top for candy eyes.
Step 10: Decorate with Candy Eyes
Gently press two candy eyes into each frosted brownie bar to create that charming mummy look.
Step 11: Serve Your Mummy Brownies
Arrange your Mummy Brownies on a serving platter and enjoy this spooky yet delicious treat!
How to Serve Mummy Brownies
Mummy Brownies are not only a delight to eat but also a treat for the eyes. Here are some fun serving suggestions that enhance their spooky charm and make them perfect for Halloween gatherings.
Spooky Dessert Table
- Create a themed dessert table with other Halloween treats like ghost-shaped cookies and pumpkin cupcakes to complement the Mummy Brownies.
Festive Party Plates
- Serve each brownie on colorful Halloween-themed plates. Add some fake spider webs or mini pumpkins around the plate for an extra festive touch.
Gift Packages
- Wrap individual Mummy Brownies in clear cellophane bags tied with orange ribbons. These make great party favors for guests to take home!
Pair with Ice Cream
- Offer a scoop of vanilla or pumpkin ice cream alongside the brownies. The creaminess contrasts perfectly with the fudgy texture of the brownies.
Hot Chocolate Bar
- Set up a hot chocolate bar and serve warm Mummy Brownies alongside. Add toppings like whipped cream, marshmallows, and chocolate shavings for a cozy treat.
How to Perfect Mummy Brownies
To ensure your Mummy Brownies turn out perfectly every time, follow these helpful tips.
- Use Room Temperature Ingredients: Using eggs and butter at room temperature helps create a smoother batter, resulting in fudgier brownies.
- Don’t Overmix: Mix the batter just until combined. Overmixing can lead to dense brownies rather than light, fudgy ones.
- Watch Your Baking Time: Keep an eye on your brownies while they bake. They should be removed from the oven when a toothpick comes out with moist crumbs, not clean.
- Cool Completely Before Frosting: Allow the brownies to cool fully before adding frosting to prevent it from melting and sliding off.
- Experiment with Toppings: Feel free to add extra toppings like crushed candy bars or sprinkles for added texture and flavor.
Best Side Dishes for Mummy Brownies
Mummy Brownies can be paired with various side dishes that enhance their appeal and create a delightful dining experience. Here are some great options:
- Witch’s Brew Punch
A spooky green punch made with lime sherbet and lemon-lime soda for a refreshing drink that complements the sweetness of the brownies. - Caramel Apple Slices
Fresh apple slices drizzled with caramel sauce offer a crunchy contrast to the soft brownies, making for a balanced dessert spread. - Ghostly Fruit Skewers
Skewers of banana ghosts (with chocolate chip eyes) and grapes provide a healthy yet festive addition to your dessert table. - Pumpkin Pie Bites
Mini pumpkin pie bites deliver seasonal flavors that pair well with chocolate desserts while keeping the Halloween spirit alive. - Cheesy Spider Web Dip
A creamy cheese dip styled like a spider web served with tortilla chips brings savory options alongside your sweet treats. - Chocolate-Covered Pretzels
Sweet and salty, these treats are perfect for nibbling between bites of fudgy brownies and add variety to your snack lineup.
Common Mistakes to Avoid
When making Mummy Brownies, it’s easy to run into some common pitfalls. Here are a few mistakes to watch out for:
- Ignoring the cooling time: Allowing your brownies to cool completely is crucial for easier cutting and better texture. Avoid cutting them too soon to prevent a gooey mess.
- Overmixing the batter: Mixing too much can lead to dense brownies. Stir just until combined for that perfect fudgy texture.
- Using cold ingredients: Cold eggs or butter can affect the mixing process. Always use room temperature ingredients for best results.
- Not checking for doneness: Baking times may vary, so check your brownies a few minutes early. A toothpick should come out with moist crumbs, not wet batter.
- Neglecting frosting consistency: The frosting should be light and fluffy. If it’s too thick or thin, adjust with milk or powdered sugar accordingly.
Storage & Reheating Instructions
Refrigerator Storage
- Mummy Brownies can be stored in an airtight container in the refrigerator for up to 5 days.
- Make sure they are completely cooled before storing to prevent condensation.
Freezing Mummy Brownies
- You can freeze Mummy Brownies for up to 3 months.
- Wrap each brownie tightly in plastic wrap and then in aluminum foil before placing them in a freezer-safe bag.
Reheating Mummy Brownies
- Oven: Preheat the oven to 350°F, place brownies on a baking sheet for about 10 minutes until warmed through.
- Microwave: Heat individual brownies on a microwave-safe plate for about 10-15 seconds. Be careful not to overheat.
- Stovetop: Place brownies in a skillet over low heat, covering with a lid until warmed through.
Frequently Asked Questions
What are Mummy Brownies?
Mummy Brownies are fudgy chocolate brownies topped with chocolate frosting piped like mummy bandages, complete with candy eyes. They’re perfect for Halloween!
How do I make Mummy Brownies from scratch?
To make Mummy Brownies from scratch, follow the recipe provided by mixing melted butter, sugar, eggs, flour, cocoa powder, and chocolate chips before baking.
Can I customize my Mummy Brownies?
Absolutely! You can add nuts or different types of candy toppings to personalize your Mummy Brownies according to your taste.
How long do Mummy Brownies last?
Mummy Brownies can last up to 5 days in the refrigerator or up to 3 months if frozen properly.
Can kids help make Mummy Brownies?
Yes! This is a fun recipe that kids can help with, especially when decorating the brownies with frosting and candy eyes.
Final Thoughts
Mummy Brownies are not only delicious but also visually appealing, making them a delightful addition to any Halloween celebration. Their fudgy texture pairs wonderfully with rich chocolate frosting, allowing for creative customization. Encourage your family and friends to join you in making these spooky treats; they’ll surely enjoy both crafting and indulging in these festive delights!
Mummy Brownies
- Total Time: 1 hour
- Yield: 12 servings 1x
Description
Mummy Brownies are a delightful Halloween treat that combines the rich flavors of fudgy chocolate brownies with a spooky, festive twist. These easy-to-make brownies are layered with creamy chocolate frosting piped to look like mummy bandages, topped off with adorable candy eyes for a fun presentation. Perfect for parties or as a fun baking project with kids, these Mummy Brownies will be a hit at any Halloween gathering. With simple ingredients and straightforward steps, you can create these delicious desserts in no time!
Ingredients
- 1 cup unsalted butter, melted
- 2 cups granulated sugar
- 4 large eggs
- 2 teaspoons vanilla extract
- 1 1/2 cups all-purpose flour
- 1 cup unsweetened cocoa powder
- 1/2 teaspoon baking powder
- 1/2 teaspoon salt
- 1 cup semi-sweet chocolate chips
- 1/2 cup unsalted butter, softened
- 2 cups powdered sugar
- 1/2 cup unsweetened cocoa powder
- 3 tablespoons milk
- 1 teaspoon vanilla extract
- 24 candy eyes (2 per brownie)
Instructions
- Preheat your oven to 350°F and line a 9×13 inch baking pan with parchment paper.
- In a bowl, mix melted butter and granulated sugar until smooth. Beat in eggs one at a time and stir in vanilla.
- In another bowl, whisk flour, cocoa powder, baking powder, and salt. Gradually add this to the wet mixture until just combined. Fold in chocolate chips.
- Pour the batter into the prepared pan and bake for 25-30 minutes until a toothpick comes out with moist crumbs. Let cool completely.
- For frosting, beat softened butter until creamy, then gradually add powdered sugar and cocoa powder. Mix in milk and vanilla until fluffy.
- Pipe frosting onto cooled brownie bars and place two candy eyes on each to complete the mummy look.
- Prep Time: 30 minutes
- Cook Time: 30 minutes
- Category: Dessert
- Method: Baking
- Cuisine: American
Nutrition
- Serving Size: 1 serving
- Calories: 290
- Sugar: 26g
- Sodium: 120mg
- Fat: 15g
- Saturated Fat: 8g
- Unsaturated Fat: 6g
- Trans Fat: 0g
- Carbohydrates: 36g
- Fiber: 2g
- Protein: 3g
- Cholesterol: 55mg